Use cases in Antares consists of scripts that interact with the circuit just like a regular user would. The script of a use case can be used to program simulated user interactions such as pressing a switch. The user of a circuit can start the programmed use cases and observe how the circuit behaves without having to interact with the circuit at the right time.
See Scripting in Use Cases for an in-depth explanation of how to use scripting for use cases.
Examples
A simple example of use cases are the possible uses of an SR flip-flop, i.e. "Set" and "Reset". When setting, first both inputs "S" and "R" are set to 0 and then the input "S" is set to 1.
A more complex example is the execution of a specific machine instruction in a microprocessor without the microprocessor being built into a using circuit with ROM, RAM and timer. If, for example, a LODD (Load Direct) instruction is to be executed, the following must happen after starting simulation, depending on the microprocessor:
-
At address 0 of the (non-existent) program memory, the LODD command with the address of the memory cell to be read out must be present
-
The clock input of the microprocessor must provide changing signals with a not too large period.
-
The machine command LODD must be present on the data bus at the correct time.
-
The data of the read memory cell must be available on the data bus at the correct time.
With the Antares "Use Cases" feature, it is possible to define a use case "LODD" in the microprocessor circuitry that takes the right actions at the right time. The user, who has opened the microprocessor circuit, starts only this use case and can then observe how the microprocessor executes the machine instruction.
Execute Use Cases
The Antares simulation toolbar contains a selection box that offers all use cases defined in a circuit for execution.

When the user starts the execution of a use case, Antares automatically switches to simulation mode and starts the use case script. All possibilities of the simulation mode are available, such as controlling the simulation speed, single step mode or signal animation. If Scenarios are defined for the current circuit, they will also be applied and their descriptions will be displayed during the execution of the use case.
At the end of a use case execution, Antares remains in simulation mode, so that the human user can take in on from there by himself.
Test Cases
For each use case, a test case can also be defined to check that the circuit functions correctly when this use case is executed.
A test case consists of a separate script that typically checks states of the circuit, e.g. whether an output has a certain value or whether an LED is on. When executing a test case, Antares first executes the use case and then the test case script. For each test condition that is not met, Antares adds a new entry in the "Isses" view at the bottom of the main window.
Configuration
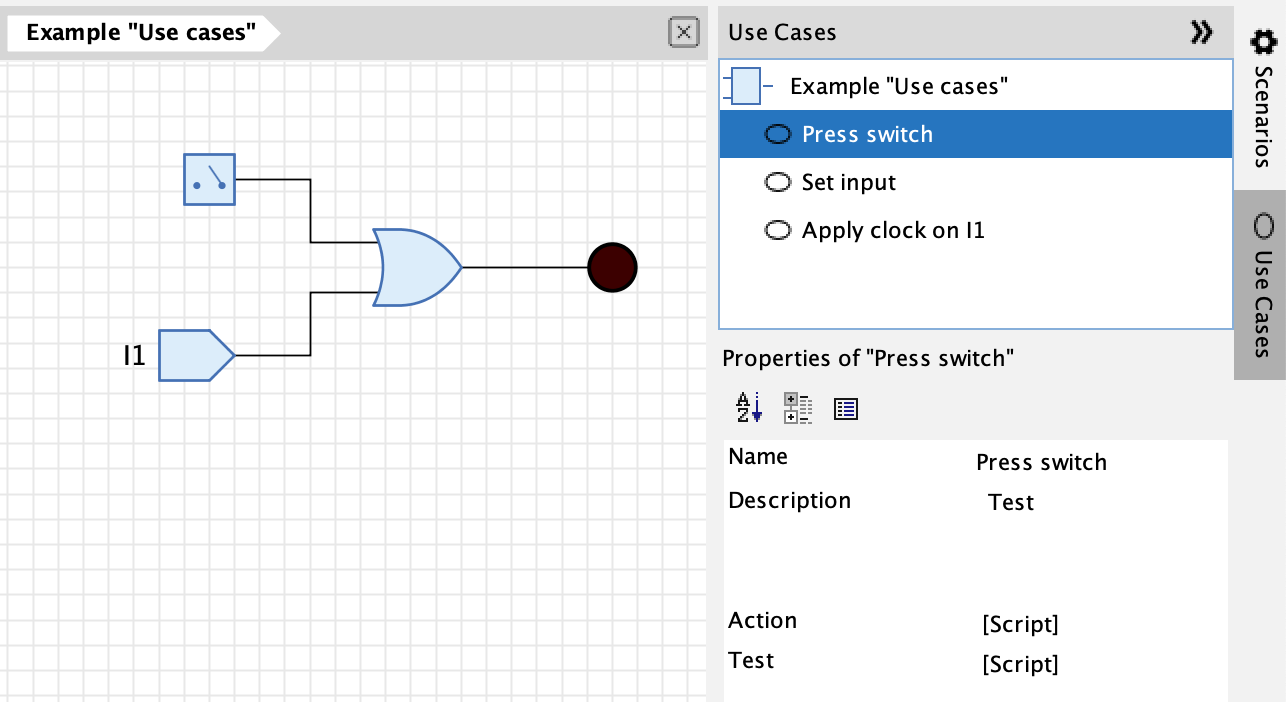
Use cases of the open circuit are configured in the "Use Cases" sidebar that opens on the right side of the Antares window.
The sidebar contains a tree with all use cases (oval icon). When you select a node in the tree, the properties of the use case are displayed in the properties view below it and are available for modification.
Actions
To add or delete use cases, select a node in the tree and perform an action from the main menu or the context menu (right mouse button).
- New Use Case
-
Context menu on the circuit node. After entering the name of the new use case (in the current language), it is added to the tree.
- Delete Use Case
-
Context menu on the use case node. After a confirmation prompt, the selected use case is deleted.
- Run
-
Context menu on the use case node. Starts the execution of the application case.
- Run Test
-
Context menu on the application case node, which is only active if a test case exists for the selected application case. Runs the use case and the test case script.
- Run all Tests
-
Context menu on the circuit node. Runs the tests of all use cases.
Properties of Use Cases
- Name
-
The name of the use case that can be translated into all supported languages.
- Description
-
The description of the use case that can be translated into all supported languages. In the current version of Antares it is only used in the Properties View.
- Action
-
The script that contains the logic of the use case.
ExamplepressButtonAt(10000, 1) - Test
-
The script that contains the test conditions of the use case.
ExampleassertLedOnAt(20000, 2)
Recording Use Cases
The scripting API used for writing "Action" scripts in use cases also features the following two functions:
clickMouseAt(time: Long, x: Int, y: Int, delay: Int)
clickKeyAt(time: Long, keyCode: Int, delay: Int)
These functions can be useful if a use case includes user actions on subcircuit symbol controls, such as clicking on a DIP switch or a button on a symbol. The function pressButton(time: Long, id: Int) would not be applicable in this situation, because is can only be used for top-level circuit elements, not for controls in a subcircuit symbol. However, writing a lot of clickMouseAt() function calls can be tedious, especially since you have to find out the x and y coordinates of the mouse pointer.
To make the creation of such use case action scripts easier, Antares has a "Record Use Case" mode. Using this mode, Antares can automatically record all mouse clicks and keyboard key presses during a simulation run and add them to the use case action script.
To enter the "Record Use Case" mode, select an existing use case in the "Use Cases" tab at the right side of the main window. Open the context menu by right-clicking and select "Record…". Antares will then open the "Record Use Case" dialog.
Recording consists of 4 steps:
-
Configure recording
-
Recording
-
Stop recording
Configure recording
Use case recording supports 2 different modes: In "Realtime" mode, the time between two clicks (mouse or keyboard) when executing a use case will be the same as during recording. If you wait 5 seconds between 2 clicks during recording, the clicks will be later replayed with a 5 second pause when executing the use case. In "Non-realtime" mode, the clicks are recorded to replayed "as fast as possible", or at least faster than you are able to produce them during recording.
Use the following properties in the dialog to configure recording.
- Realtime
-
If selected, "Realtime" mode is activated. Note that this will disable property "Time between clicks".
- Click/release delay
-
The delay (in ms) between clicking the mouse (or a key) and releasing it again. This value should not be smaller than the "Propagation delay" value of your interactive components like switches, whose default is configured in the user preferences in "Circuit → Switch propagation delay".
- Time between clicks
-
The time (in ms) between 2 click actions. Only enabled in "Non-realtime" mode.
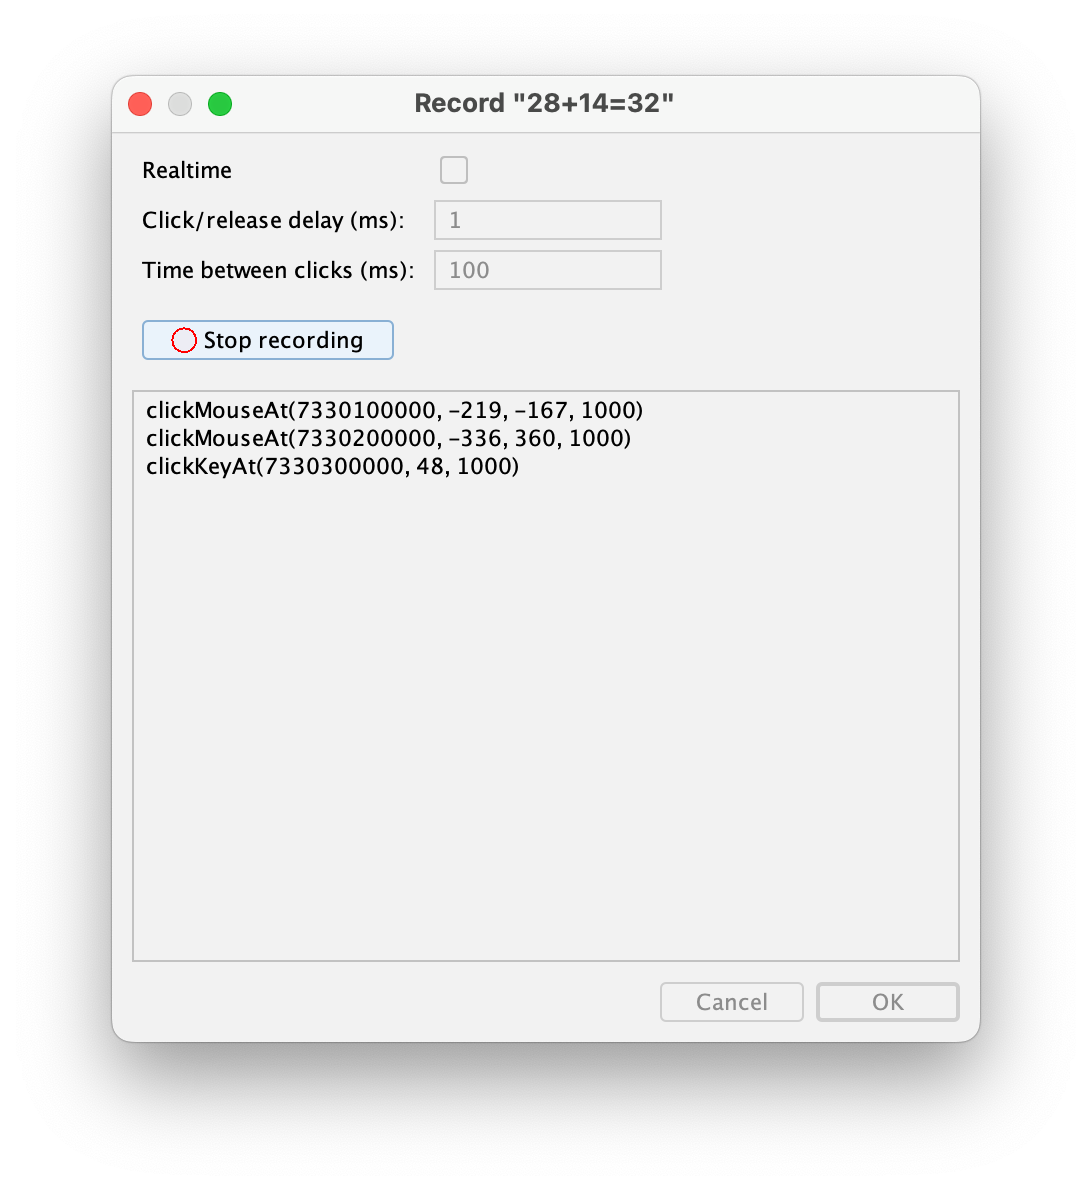
Recording
After you’ve configured recording, you can hit Start recording. This will start the simulation of the currently open circuit, and Antares will start listening for mouse and keyboard clicks. Every registered click is recorded as Antares scripting function in the text area below.
Note that the recording dialog switches from "modal" mode to "non-modal" mode, which is necessary to let you click in the simulated circuit. Also note that the button text changes to "Stop recording", and a red glowing icon indicates that Antares is recording your clicks.
Stop recording
Once you’ve done everything in the simulation that should be part of your use case, press Stop recording. This will stop the simulation, and the dialog switches back to "Modal" mode. If you’re happy with your recording, press OK to set the recorded click statements as "Action" script of your use case. If not, leave the dialog by pressing Cancel, or do another recording round by pressing "Start recording" again.